Imagine transforming a humble shipping container into a chic office, cosy sleep-out, or trendy café. This is no longer just a dream for architects and designers, it’s a burgeoning trend catching the imagination of DIY enthusiasts, homeowners, and small business owners alike in New Zealand and beyond.
The rise of shipping container modifications offers a cost-effective and customisable approach to creating versatile spaces. This guide will walk you through everything you need to know to start your own DIY shipping container project, from choosing the right container to advanced modifications and cost considerations.
Whether you’re creating a home office, retail kiosk, workshop, or additional storage, careful planning is essential. While many aspects of container conversions can be completed as DIY projects, structural modifications, electrical work, and plumbing should always be approached with safety and local building requirements in mind.
Choosing the Right Container
Factors to Consider
Selecting the right shipping container is crucial for a successful modification project. Consider the size, condition, and purpose of the container. Standard containers come in various sizes, but the most common are 20ft and 40ft. High cube containers offer extra height, providing more headroom.

When choosing a container, inspect it thoroughly for rust, dents, and structural integrity. A few cosmetic flaws are manageable, but avoid containers with significant damage or wear.
Pay particular attention to the container’s corner posts, roof rails, flooring, and door seals. Surface rust is often repairable, but extensive corrosion or structural damage may affect the container’s strength and increase modification costs.
Expert Tip:
When inspecting a used container, ensure the doors open and close smoothly and that the container remains square. Misaligned doors can indicate the container has been twisted during transport or lifting.
Where to Buy?
When it comes to sourcing shipping containers in New Zealand, NZBOX stands out as one of the leading suppliers in the industry. Offering a diverse selection of containers for both hire and sale, we cater to a variety of needs, whether you’re looking for a temporary solution or a long-term investment.
Our commitment to quality ensures that customers receive containers that are not only structurally sound but also versatile for various modifications. With competitive pricing and excellent customer service, NZBOX has established itself as a trusted partner for DIY enthusiasts and businesses alike, simplifying the process of finding the perfect shipping container for your project.
Purchasing from a reputable supplier also gives you greater confidence in the container’s condition and history. Many suppliers can help you choose between new (one-trip) and used containers depending on your budget, intended use, and expected lifespan of the project.
Planning Your Modification
Identifying Your Needs
Before you start cutting and welding, define your needs. Are you building a storage unit, an office, living quarters, or something else? Understanding your purpose will guide your design and material choices.
Consider how the space will be used throughout the year. Factors such as insulation, ventilation, natural lighting, accessibility, and future expansion can significantly influence your design decisions and long-term satisfaction with the finished project.
Creating a Detailed Design Plan
A detailed design plan is essential. Sketch out your layout and make a list of required materials. Consider insulation, ventilation, and any additional features like windows and doors. Planning ahead will save you time and resources in the long run.
If you intend to remove large sections of the container walls for windows, roller doors, or open-plan layouts, plan structural reinforcements before making any cuts. Shipping containers rely on their corrugated steel walls for strength, and major alterations may require additional steel framing to maintain structural integrity.
Common DIY Mistake:
Many first-time builders begin cutting openings before confirming structural requirements or local consent requirements. Proper planning can help avoid costly rework later in the project.
Essential Tools and Materials
Basic and Specialised Tools
Equip yourself with the necessary tools for container modification. Basic tools include a hammer, drill, saw, measuring tape, and level. Specialised tools like a plasma cutter or oxy-acetylene torch are needed for precise cuts. Welding equipment is also essential for structural modifications.
Personal protective equipment (PPE) should always be part of your toolkit. Safety glasses, welding helmets, hearing protection, gloves, steel-capped boots, and respiratory protection help minimise the risks associated with cutting, grinding, welding, and painting steel.
Before using any cutting or welding equipment, confirm that the container has been properly ventilated and is free from hazardous residues, particularly if purchasing a used container.
Commonly Used Materials
Materials vary depending on your project but generally include insulation (rigid foam, spray foam, or fibreglass), structural materials (wood framing, metal studs, fasteners), and finishing materials (drywall, flooring, paint). For plumbing and electrical work, ensure you have pipes, wiring, fixtures, and outlets.
Choosing suitable insulation is particularly important for New Zealand’s varying climate conditions. Closed-cell spray foam provides excellent thermal performance while helping reduce condensation, whereas rigid foam boards offer a balance between insulation performance and cost.
Moisture management should also be considered. Vapour barriers, adequate ventilation, and proper sealing around windows and doors can help reduce condensation and extend the life of both the container and interior finishes.
Basic Container Modifications
Step-by-Step Guide
- Cutting and Welding:
- Start by cutting openings for doors and windows using a plasma cutter or torch.
- Weld frames around these openings to reinforce the structure.
- Weatherproofing and Insulation:
- Apply rust-proof paint to the exterior.
- From our experience modifying dozens of shipping containers across New Zealand, closed-cell spray foam performs better than fibreglass because it prevents condensation on steel walls. Rigid foam and spray foam are popular choices.
Tips for Year-Round Use
Ensure your container is well-insulated and weatherproofed to handle seasonal changes. Proper ventilation is also crucial to maintain air quality and prevent condensation.
Advanced Modifications
Electrical and Plumbing Installation
For advanced modifications, consider hiring professionals for electrical and plumbing work. Install wiring, outlets, and lighting according to your design plan. If your project includes a bathroom or kitchen, plan your plumbing system carefully.
Electrical and plumbing work should comply with New Zealand regulations and, where required, be completed or certified by appropriately licensed professionals. Proper planning during the early stages can reduce the need to reopen walls or modify completed finishes later.
If you’re installing a bathroom, laundry, or kitchen, consider water supply, wastewater disposal, hot water systems, drainage, and access for future maintenance before construction begins.
Incorporating Windows, Doors, and Custom Features
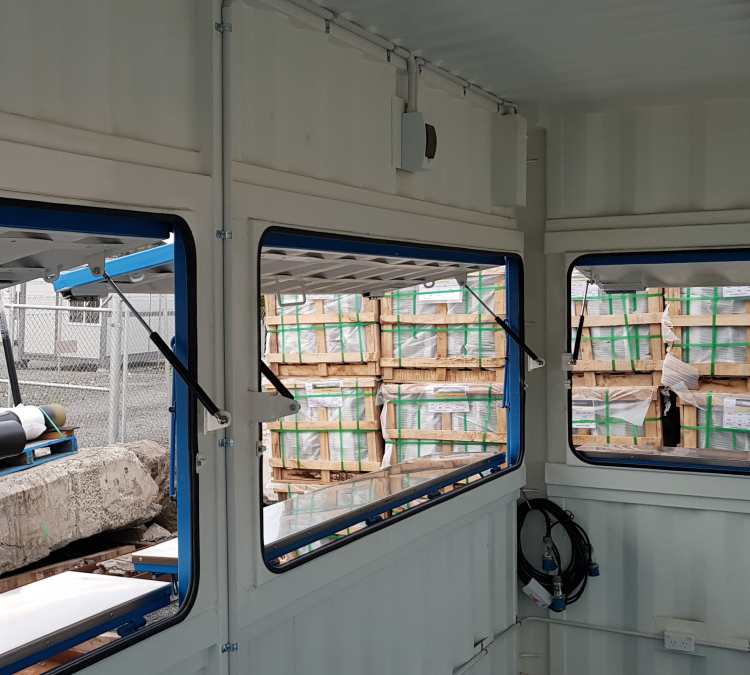
Adding windows and doors not only improves functionality but also enhances natural light and ventilation. Custom features like skylights, balconies, or extended awnings can add unique touches to your container.
Consider the orientation of your container on site. Positioning windows to maximise natural light while minimising excessive heat gain can improve comfort and reduce ongoing energy costs.
Additional features such as external cladding, solar panels, rainwater collection systems, accessible entryways, and energy-efficient glazing can further improve both functionality and long-term value.
Safety and Legal Considerations
Building Codes and Safety Standards
Always ensure your modifications meet local building codes and safety standards. This includes structural integrity, fire safety, and proper installation of electrical and plumbing systems.
Before beginning any major modification, check whether your project requires building consent or other approvals from your local council. Requirements vary depending on the intended use, location, size of the project, and whether services such as plumbing or electrical systems are being installed.
Structural modifications should not compromise the container’s load-bearing capacity. If large sections of steel are removed, additional reinforcement may be necessary to maintain structural performance.
Safety should remain a priority throughout the project. Wear appropriate PPE when cutting, grinding, or welding, maintain adequate ventilation, and follow manufacturer instructions for all tools and materials.
Necessary Permits and Approvals
Check with your local authorities about the permits and approvals required for your modification project. Compliance with regulations is crucial to avoid legal issues and ensure the safety of your structure.
Real-Life Examples
NZBOX Container Modifications

Drawing inspiration from real-life projects can be incredibly motivating. NZBOX in New Zealand offers a range of container modifications, including:
- 10ft Container Kiosks: Ideal for small retail spaces.
- 20ft Container Cafes: Perfect for trendy, portable cafés.
- Site Offices: Functional and mobile office spaces.
- Retail Stores: Customisable for a unique shopping experience.
- Sleepouts: Cosy, compact living spaces.
- Shelving Containers: Optimised for organised storage solutions.
These examples showcase the versatility and potential of shipping container modifications.
Every container conversion begins with different requirements. Retail businesses often prioritise customer access and branding, while construction companies typically focus on secure storage and functional office space. Homeowners, on the other hand, may prioritise insulation, natural light, and comfortable year-round use. Careful planning helps ensure the finished container is practical for its intended purpose.
Planning the layout, services, and structural modifications before work begins can also reduce unexpected costs and improve the overall efficiency of the project.
Cost Breakdown and Future Savings
Estimating Total Costs
The cost of a DIY container modification varies widely based on factors like container size, materials, and labour. Generally, expect to spend between $10,000 and $100,000. Budget for container purchase, transportation, site preparation, materials, labour, and permits.
Typical costs may include:
- Container purchase
- Delivery and positioning
- Site preparation or foundations
- Structural modifications
- Insulation and interior lining
- Electrical installation
- Plumbing (if required)
- Windows and doors
- Painting and finishing
- Council consent or inspection costs where applicable
While smaller storage conversions may sit at the lower end of the budget range, projects involving kitchens, bathrooms, commercial fit-outs, or residential accommodation generally require a larger investment due to additional services and compliance requirements. Obtaining quotes before starting helps establish a realistic budget.
Comparing Costs to Traditional Construction
Compared to traditional construction, container modifications can offer significant savings. The reuse of materials and simplified construction process often result in lower costs and quicker project completion.
Conclusion
Transforming a shipping container into a functional and stylish space is an exciting and rewarding DIY project. While it comes with its challenges, the benefits of customisation, cost savings, and sustainability make it an appealing choice for many. Whether you’re a homeowner looking to expand your living space, a business owner seeking a unique office, or a DIY enthusiast eager for a new project, shipping container modifications offer endless possibilities.
Successful container projects begin with careful planning, realistic budgeting, and a clear understanding of your intended use. Investing time in selecting the right container, designing an efficient layout, and understanding local requirements can help reduce unexpected costs and improve the long-term performance of your project.
While many finishing tasks can be completed by experienced DIYers, structural alterations, electrical installations, and plumbing work may require professional advice or licensed trades to ensure the project is safe, durable, and compliant with applicable regulations.
By following this comprehensive guide, you can confidently embark on your shipping container modification journey and create a space that’s truly your own. For further advice and guidance, please reach out to the team at NZBOX who will be more than happy to provide advice and guidance about shipping container modifications.
Frequently Asked Questions
What should I consider when choosing a shipping container for DIY modification?
When selecting a shipping container, it’s important to consider the size, condition, and intended use of the container. Standard sizes like 20ft and 40ft are common, while high cube containers offer extra height. Always inspect the container for structural integrity, avoiding any with significant rust, dents, or damage that could compromise your project.
How do I plan a successful DIY container modification project?
The key to a successful DIY container project is defining your goals early and creating a detailed design plan. Before making any structural changes, decide whether you’re building a storage space, office, or living quarters. Sketch your layout, list all materials and features you’ll need, and factor in insulation, ventilation, and window or door placements to avoid delays and unexpected costs.
What tools and materials are essential for modifying a shipping container?
Basic tools like a hammer, saw, drill, measuring tape, and level are necessary, but for cutting through steel and welding reinforcements, you’ll also need specialised tools such as a plasma cutter, oxy-acetylene torch, and welding equipment. Common materials include insulation (like spray foam or rigid foam), wood or metal framing, electrical wiring, plumbing components, and interior finishes such as drywall and paint.
Are there legal and safety considerations when modifying a container?
Yes, it’s crucial to comply with local building codes, safety regulations, and zoning laws when modifying a shipping container. You may need permits and professional guidance, especially for structural changes, electrical wiring, or plumbing installations. Ensuring your container is safe, weatherproof, and built to code will help you avoid legal issues and costly rework.
How much does a DIY shipping container project cost, and is it more affordable than traditional construction?
DIY container projects can range in cost from around $10,000 to $100,000, depending on the size of the container, scope of modifications, materials used, and whether professional help is needed. While there are upfront costs for the container, tools, and permits, container projects generally offer significant savings compared to traditional building methods and can be completed in less time with more design flexibility.